What is LSB Steganography?
Steganography is the practice of concealing secret information into a larger, innocuous piece of data. One of the most common ways in which steganography is done, is through hiding information inside of images. Least Significant Bit (LSB) is a common, yet effective way of achieving this. It works by taking the secret piece of information, converting it into binary, and then encoding each bit into individual pixels of an image in a way that will be imperceptible to the human eye.
For the sake of this example, we’ll start with a simple message. Let’s say we just want to encode the letter “A”. First, we would translate this to binary, which would give us “01000001”. Now, we would need to encode these 8 bits into the pixels of an image in a way that does not significantly change the appearance of the image. This will be done by changing the RGB values of each pixel until we have encoded all the bits. Because each pixel contains 3 values (red, green, blue), we can encode 3 bits into a single pixel. Which means we can fit the letter “A” into 2 and 2/3 pixels.
So let’s take a look at a representation of three pixels in an image.
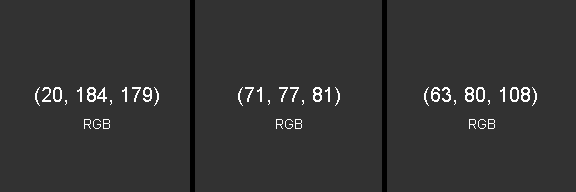
We need an encoding scheme to be able to encode the bits “01000001” into these pixels without revealing that the pixels have been tampered with. The encoding method we will use is that an even number will be read as a “0” and an odd number will be set as a “1”. So to encode the first 0 into the first pixel, we need the first RGB value to be an even number. In this case, this value (20) is already even so we don’t need to modify it at all. Now we move onto encoding the next bit, which is a 1. So we need the second value of the first pixel to be odd. As you can see, this value (184) is even so we need to change it. We simply just subtract one from that value to make it odd. So that value would now become “183”. We continue this process until our entire binary message has been encoded.
The result should look like this.
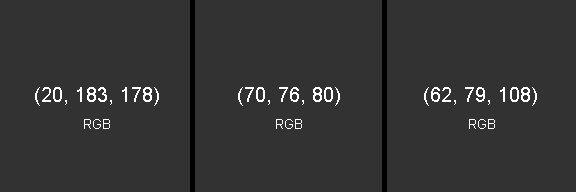
Because we only had to change each value by one (at most), the encoded image will not appear visibly different at all. In order to decode the message, we simply reverse the process, converting the even/odd values into 0s and 1s, and then converting that binary back into plaintext.
Automating This Process
As you can imagine, doing this by hand would be a tedious process, which is why I’ve created a program that not only speeds up the process, but also makes hidden message much more difficult to be extracted by anyone other than the intended recipient.
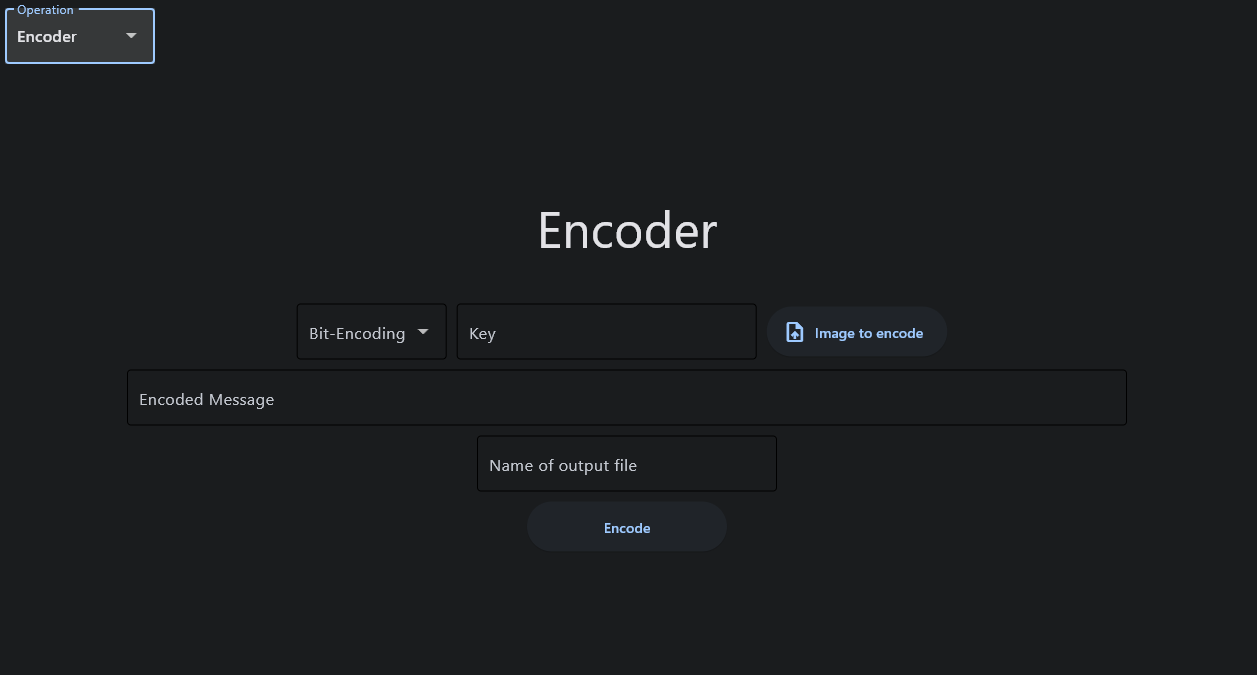
The program is simple to use. The features are as follows:
Bit-Encoding:
This drop-down box allows you to select between 7-bit encoding (which limits you to standard ASCII characters) or 8-bit encoding (which allows for extended characters, including those used in UTF-8 encoding, at the cost of using more space).
Key:
This is where you enter your key for the encoding. The key acts as a seed for randomly generating the pixels that will be used for encoding the message. Each key results in a uniquely generated variation of pixel coordinates that will be used, which adds more randomness to the encoding, making it more difficult for an unwelcome party to extract the message.
Image to encode:
As it states, this is where you select the image you want to encode your message into.
Encoded Message:
This is where you type out the message that you want to be encoded into the image.
Name of output file:
This is where you specify the name of the encoded image file that will be produced. You can exclude the file extension, as the program always outputs the file in .png format.
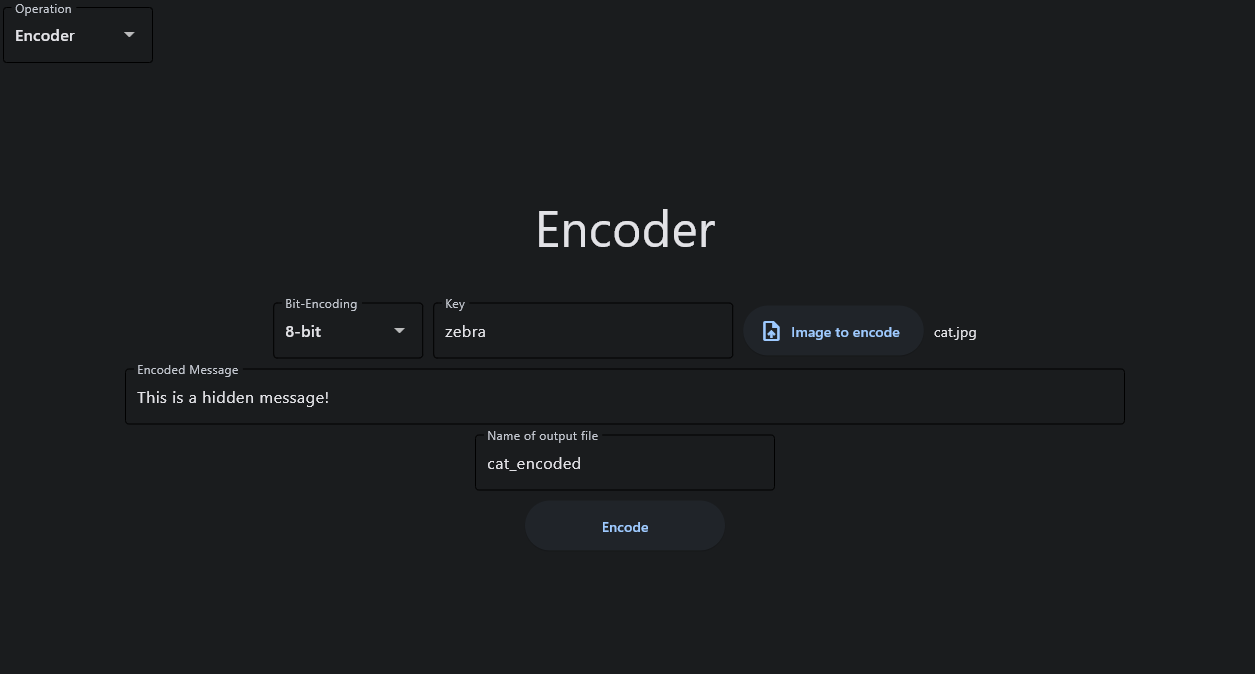
After you’ve input everything, you just click the “Encode” button, and then you’re done. Below are two images. One is the original picture. The other is the picture encoded with the hidden message. As you can see, there is no noticeable difference at all.


The decoding feature works just as simply. You put in most of the same inputs as before, but then you also have to enter the a number into the “Number of characters to read” box so the program knows how many pixels to read. In this case we know there are 25 characters in the message, but if you aren’t sure, you can just input a large number and the program will still read the full message (it will just output some gibberish at the end since it will have also read pixels that were not encoded).

If you want to use this program, the source code is available on my GitHub page, and if you want to directly download the executable, that is available on my SourceForge page.
GitHub Link: https://github.com/ericw317/LSB-Steganography
SourceForge Link: https://sourceforge.net/projects/lsb-steganography/

Leave a comment