The following is a write-up for all 50 flags in the HackMyVM Venus CTF. This was a beginner-level CTF that mainly focuses on getting people familiarized with basic linux commands and processes.
Flag 1: Sophia
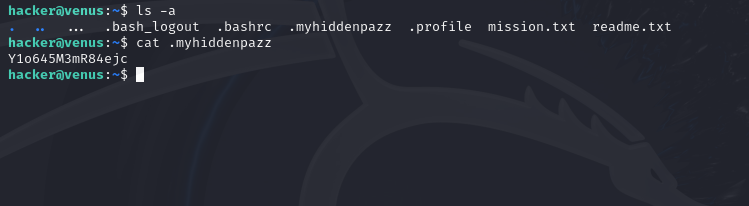
User sophia has saved her password in a hidden file in this folder. Find it and log in as sophia.
To solve this one, you’ll need to use the command “ls -a”, which will list all files in the current directory (including hidden ones). From here, you will find a file called “.myhiddenpazz”, which you can print the contents of using the “cat” command. This will print the flag.
Flag 2: Angela
The user angela has saved her password in a file but she does not remember where … she only remembers that the file was called whereismypazz.txt
To find this flag you will need to utilize the “find” command, which allows you to search for files. The command we will be using is this:
find / -name "whereismypazz.txt" 2>/dev/null
Here is a breakdown of what each part of this command does:
- find: specifies the command name
- /: specifies the directory in which the search will start (root directory in this case so we can search the entire system)
- -name: flag that specifies we are looking for a file name
- “whereismypazz.txt”: specifies the name of the file we’re searching for
- 2>/dev/null: discard any error messages
This will output the path to all files found with this command.
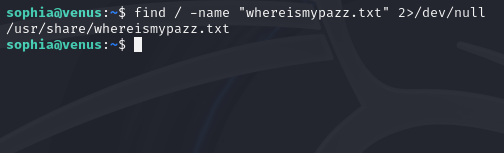
Once we find the file path, we can print the contents using the “cat” command.

Flag 3: Emma
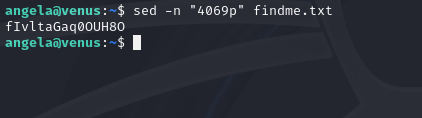
The password of the user emma is in line 4069 of the file findme.txt
This challenge utilizes basic use of the “sed” command. Sed means “Stream Editor” and is a powerful text processing command. To retrieve this flag, we will be using sed to print the line that contains the password:
sed -n "4069p" findme.txt
- -n: flag that suppresses the default behavior of sed (which is to print every line)
- “4069p”: prints the 4,069th line of the specified text file
- findme.txt: specifies the text file to manipulate
Flag 4: Mia
User mia has left her password in the file -.
Because the file is called “-“, you can’t just use the “cat -” command to print it, because linux interprets the “-” character as an instruction to read from standard input. So instead, you need to specify the full path using the command “cat ./-“.

Flag 5: Camila
It seems that the user camila has left her password inside a folder called hereiam
This challenge utilizes the “find” command to search for a specific directory. In this case, we will be searching for a directory called “hereiam”:
find / -type d -name "hereiam" 2>/dev/null
- /: specifies the directory to start the search in
- -type d: specifies that we are searching for a directory
- -name “hereiam”: specify the name of the directory to search for
- 2>/dev/null: discard any error messages

Flag 6: Luna
The user luna has left her password in a file inside the muack folder.
For this challenge you’ll need to use the “grep” command, which is used to search for patterns within files. We will use this command to search every file in the “muack” directory for a string that matches the pattern we would expect for the password. Every password we’ve found so far has been exactly 15 characters, so this is the pattern we will search for with this command:
grep -Er '^.{15}$' ./muack
- -E: This flag enables regular expressions, which are used to specify patterns
- -r: This flag will do a recursive search
- ‘^.{15}$’: This is a regular expression that searches for a line that contains exactly 15 characters
- ./muack: specifies the path to the directory to search

Flag 7: Eleanor
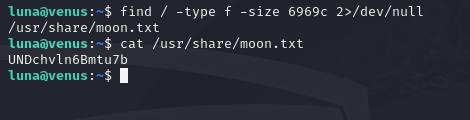
The user eleanor has left her password in a file that occupies 6969 bytes.
To find this password we will be using the “find” command again to search for a file that is 6,969 bytes.
find / -type f -size 6969c 2>/dev/null
- /: specifies the directory to start the search in
- -type f: specifies that we are searching for a file
- -size 6969c: specifies a file size of 6,969 bytes
- 2>/dev/null: discard any error messages
Flag 8: Victoria
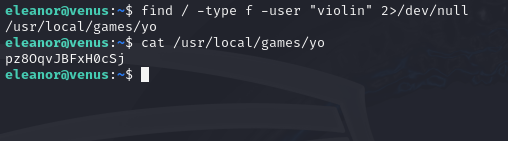
The user victoria has left her password in a file in which the owner is the user violin.
This challenge requires use of the “find” command again to search for a file belonging to the user “violin”.
find / -type f -user "violin" 2>/dev/null
The command follows the same format as the previous times we’ve used the “find” command, except this time we’re just using the “-user” flag to specify a user that the file belongs to.
Flag 9: Isla
The user isla has left her password in a zip file.
Using the “ls” command, we can see that the name of the zip file is “passw0rd.zip”. We can use the “unzip” command to unzip the file and then the “cat” command to print the contents of the file. The “unzip” command is as follows:
unzip passw0rd.zip -d /tmp/unzipped_pass
- passw0rd.zip: specifies the file to unzip
- -d: flag that indicates we are about to enter a directory store the unzipped file contents in
- /tmp/unzipped_pass: path of directory to unzip file to

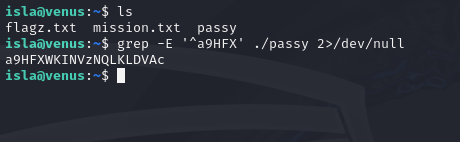
Flag 10: Violet
The password of the user violet is in the line that begins with a9HFX (these 5 characters are not part of her password.).
This challenge utilizes the “grep” command again to use a regular expression to find the line that contains the password. This is the command we will use:
grep -E '^a9HFX' ./passy 2>/dev/null
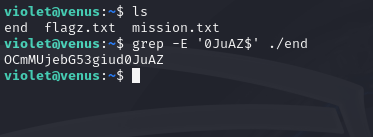
Flag 11: Lucy
The password of the user lucy is in the line that ends with 0JuAZ (these last 5 characters are not part of her password)
For this one, we’ll need to use the “grep” command again to create a regular expression to find a line that ends with “0JuAZ”. The following command will suffice:
grep -E '0JuAZ$' ./end
Flag 12: Elena
The password of the user elena is between the characters fu and ck
Using grep again we’ll create a regular expression to search for a string of text between the letters “fu” and “ck” using this command:
grep -E 'fu(.*?)ck' ./file.yo

Flag 13: Alice
The user alice has her password is in an environment variable.
This level familiarizes us with Linux environment variables, which can be accessed with the command “env”. After which, we can see the password stored as a variable called “PASS”.

Flag 14: Anna
The admin has left the password of the user anna as a comment in the file passwd.
To start this one, we should take a look at the “passwd” file, which is usually located in the directory /etc/passwd on Linux systems.

What you see in the screenshot is only a small portion of the output. Instead of looking at this line by line ourselves to find the password, we can locate it using a simple grep command:
grep alice /etc/passwd

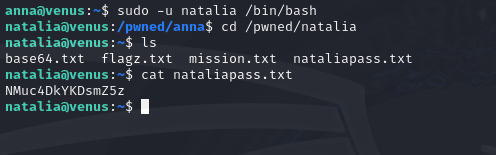
Flag 15: Natalia
Maybe sudo can help you to be natalia.
This challenge serves as a basic introduction to privilege escalation. This is where the “sudo” command will come in handy. The “sudo” command allows you to run commands with elevated privileges. By default, putting “sudo” in front of a command will attempt to run the command as root. But if we add the flag “-u” to the command, we can choose which user to run the command as. First, let’s do the command “sudo -l” to see which commands Anna can run with sudo.

This tells us that Anna can use sudo to impersonate Natalia, and the only command she can run with sudo is “/bin/bash”. This is perfect since this command will open a shell. So we can open an interactive shell as Natalia by running the following command:
sudo -u natalia /bin/bash
This gives us full access to Natalia’s account. From there we can easily navigate to where her password is stored.
Flag 16: Eva
The password of user eva is encoded in the base64.txt file
For this level we just need to decode the base64 into plaintext which can be done using the base64 command:
base64 -d base64.txt

Flag 17: Clara
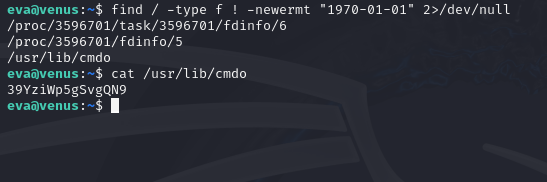
The password of the clara user is found in a file modified on May 1, 1968.
This will use the “find” command again, which we’ve used before, but this time we’ll need to search for a file with a specific modification time. To do this, we can use this flag:
-newermt <date>
Adding this flag to the command specifies that we’re looking for a file with a modification time that is newer than this specified date. But since we want to look for a modification fairly far back, we will need to add a negation operator (!) in front of it so that it will actually look for a file with a modification time older than the specified date. So it will look like this:
! -newermt <date>
The modification time we’re looking for is 1968-05-01, which is a date we can’t actually specify since we can’t input dates that are older than the Linux epoch (1970-01-01). So we will just use the “find” command to search for all files that are older than the Linux epoch. The full command will be this:
find / -type f ! -newermt "1970-01-01" 2>/dev/null
Flag 18: Frida
The password of user frida is in the password-protected zip (rockyou.txt can help you)
This challenge is a great introduction to basic password cracking. To crack the password-protected zip file, we will first need to download it to our local machine using the scp command.
scp -P 5000 clara@venus.hackmyvm.eu:/pwned/clara/protected.zip ./
- scp: calls the scp (Secure Copy Protocol)
- -P 5000 clara@venus.hackmyvm.eu:/pwned/clara/protected.zip: the port, username, and address of the remote host followed by the path to the file on the remote system
- ./: specifies the path to save the file locally (current directory in this case)


Now to crack the file, first we need to extract the hash. We can do this using “zip2john”. Zip2john comes pre-installed in some linux distros (like Kali Linux), but if you’re using a version of Linux that doesn’t have it installed, you can install it with the command, “sudo apt install john”. To get this zip2john on Windows you can download John the Ripper and the “zip2john.exe” file will be in the “run” folder. If you’re using a Mac then you need to please re-think your life decisions.
Anyway, regardless of whether you’re running Windows or Linux, you will need to run zip2john from the command line to extract the hash from the zip file.
zip2john protected.zip

The hash for this type of zip file is everything between and including $pkzip$ and $/pkzip$. After you’ve extracted the hash, you can start cracking. There are many types of password cracking software out there, but my personal favorite is Hashcat because of how well it’s optimized for GPU acceleration. If you use Hashcat for this, this is the command you’ll need to run:
hashcat -m 17225 protected_hash.txt rockyou.txt
- -m 17225: Sets the mode to 17225 (the mode number for a pkzip hash)
- protected_hash.txt: The text file in which the hash is saved
- rockyou.txt: The dictionary used to run a dictionary attack on the hash
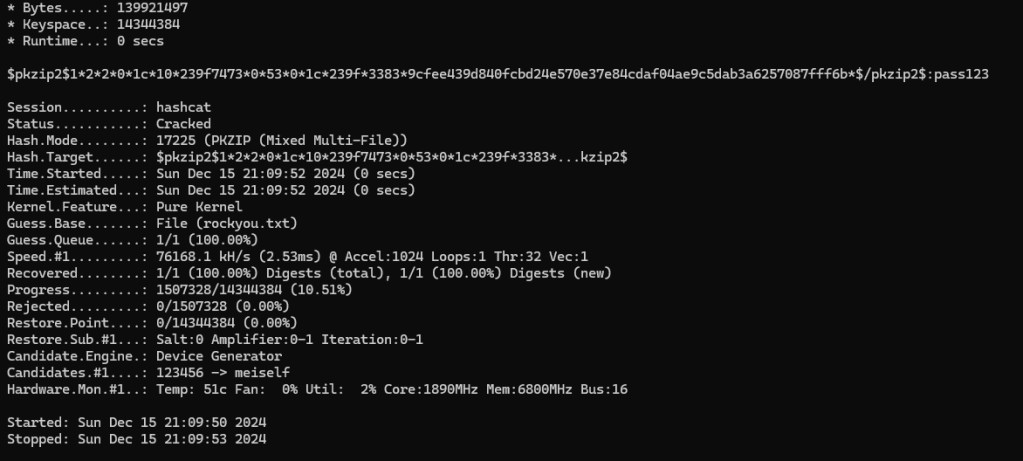
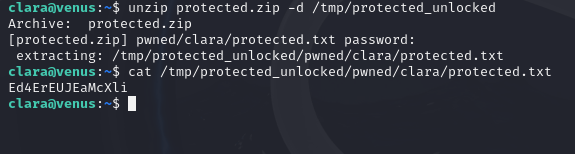
The attack was successful, and here we can see that the password to the zip file is “pass123”. If we use this password to unzip the zip file and read the contents of the text file inside it, we will find the final password to complete level.
Flag 19: Eliza
The password of eliza is the only string that is repeated (unsorted) in repeated.txt.
This level is to help us get familiarized with the “uniq” command. Uniq is a command that is used for processing files that contain identical lines. Since we know Eliza’s password is the only string that is repeated here, this will be easy to find. However, it’s important to note that uniq only works if the file is already sorted. So before processing this file, we need to sort it using the sort command. Afterward, we can use this command to show ONLY lines that have been repeated.
uniq -d repeated.txt
- uniq: calls the “uniq” command
- -d: flag that tells the command to only show repeated lines
- repeated.txt: the file that we want to process

Flag 20: Iris
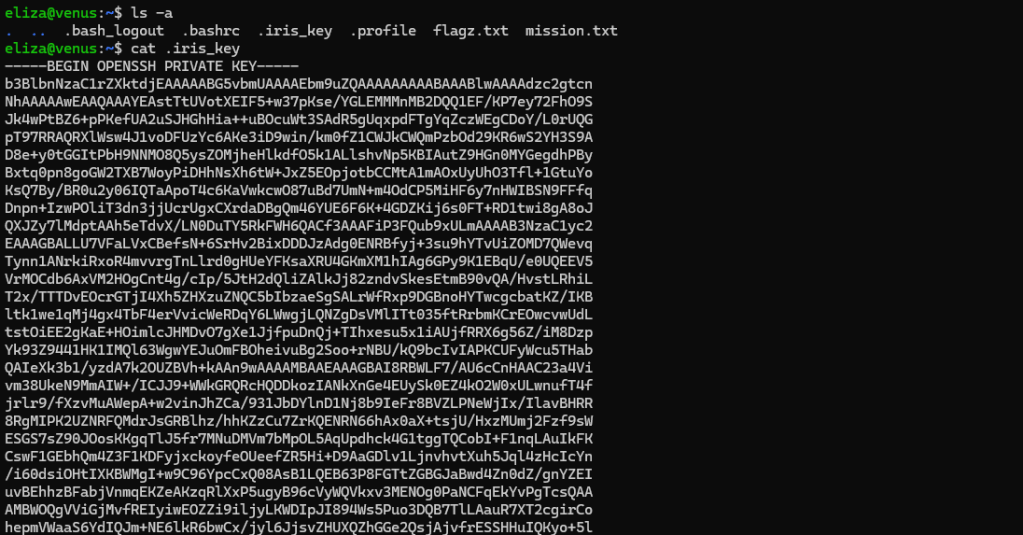
The user iris has left me her key.
This level simply involves logging into an SSH server using a private key file instead of a password. If we print the key file we can see an example of what an OpenSSH private key looks like.
To log in to Iris’ account using the private key, it’s very similar to how you’d normally log in, except you just need to specify the key path first. This is what the command will look like:
ssh -p 5000 -i ./.iris_key iris@venus.hackmyvm.eu
The “-i” flag is necessary to indicate that you’re about to specify a key path, then you just type in the path to the key.

And as you can see below, this successfully logs us in to Iris’ account.

Flag 21: Eloise
User eloise has saved her password in a particular way.
If we view the contents of the “eloise” file with the “cat” command, we will see what appears to be base64.


Using the “base64” command which we covered in Flag 16, we can decode the contents of this file and save it to a new file.
base64 -d eloise > /tmp/decoded_file
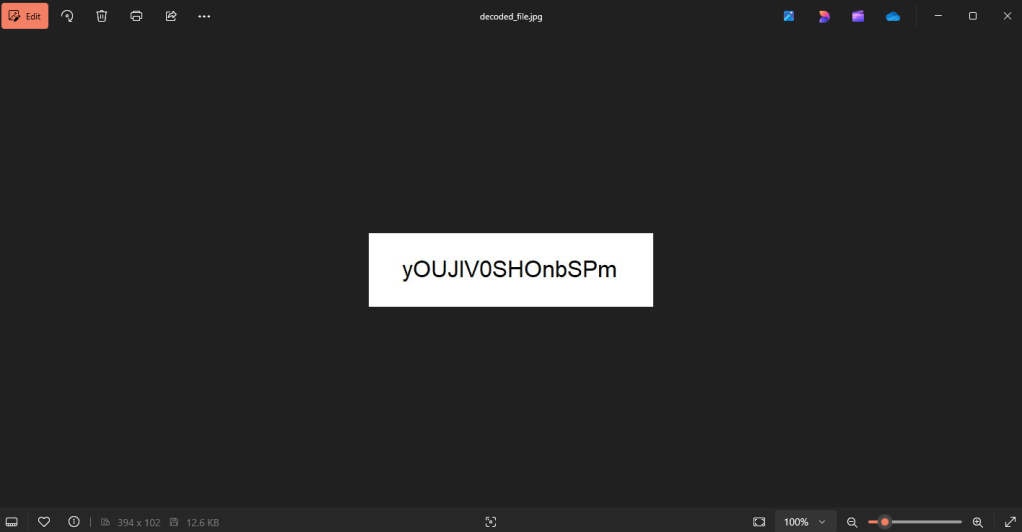
If we examine the contents of the new file, we will see that it still doesn’t appear to be humanly-readable. However, we can see that the beginning of the text reads, “JFIF”, which is a signature for a JPEG file. We can further confirm this is a jpeg file by using the command, “file /tmp/decoded_file”.


If we open this file using an image viewer, we will find the password we need.
Flag 22: Lucia
User lucia has been creative in saving her password.
Taking a look at the “hi” file shows us that we are working with hexadecimal.

We can decode this by using the “xxd” command as follows:
xxd -r -p hi
- xxd: calls the xxd command
- -r: reverses hex back to it’s binary form
- -p: specifies plain hex dump mode

Flag 23: Isabel
The user isabel has left her password in a file in the /etc/xdg folder but she does not remember the name, however she has dict.txt that can help her to remember.
This is the first challenge in this CTF where we will need to use some bash scripting. The file “dict.txt” has a list of file names. We need to check each of these file names to see if any of them exist at the directory “/etc/xdg”. The following script will loop through each file name in that list, checking to see if any of those files exist at the “/etc/xdg” directory.
while read -r filename; do
    if [ -e "/etc/xdg/$filename" ]; then
        echo "Found: /etc/xdg/$filename"
    fi
done < dict.txt
Running this shows us which file we need to look for.

Flag 24: Freya
The password of the user freya is the only string that is not repeated in different.txt
This one has us revisit the “uniq” command that we used in Flag 19. By adding the “-u” flag to the “uniq” command, it will only return unique lines in a file.

Flag 25: Alexa
User alexa puts her password in a .txt file in /free every minute and then deletes it.
We will need to utilize more bash scripting to solve this one. In order to catch the password file in the “/free” directory before it is deleted, we will need to write a script that will monitor the “/free” directory and constantly try to print the contents of every .txt in it (if it exists). The following script will do the trick.
while true; do
    cat /free/*.txt 2>/dev/null || true
    sleep 1
done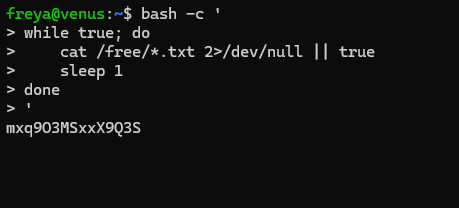
Flag 26: Ariel
The password of the user ariel is online! (HTTP)
To solve this one all we need to do is use the “curl” command, which is a command that allows you to make HTTP requests to a server.
curl http://localhost
Flag 27: Lola
Seems that ariel didn’t save the password for lola, but there is a temporal file.
Taking a look at the files in the current directory, we can see a “.swp” file, which is a temporary vim file.

We can recover the contents of the Vim file from the .swp file using the command “vim -r .goas.swp”.
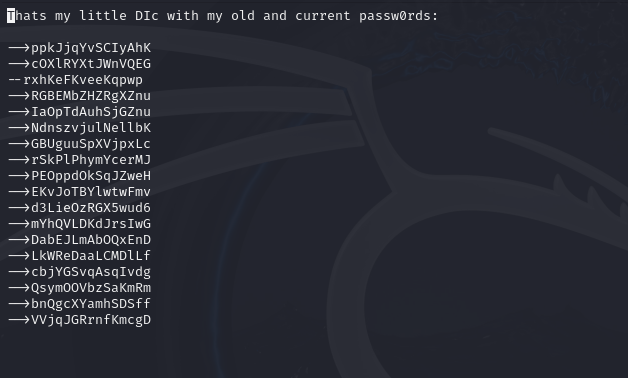
From here, we have a list of potential passwords that we can try. I’ve saved the passwords to “pass_list.txt” as well as cleaned up the formatting to get rid of the “–>” at the beginning of each line to prepare the text file for use in password cracking.

Now that we have a proper password list, we can use Hydra to try all these possible passwords to log in to Lola’s account. We will use the following command:
hydra -f -v -l "lola" -P ./new_pass_list.txt ssh://venus.hackmyvm.eu:5000
What this does:
- -f: tells Hydra to stop the attack as soon as it finds a single successful login credential
- -v: This is verbose mode, which will have Hydra print detailed information about the attack as its running
- -l “lola”: specifies “lola” as the username we want to use in all cases
- -P ./new_pass_list.txt: specifies the location of the password list we are using in the attack
- ssh://venus.hackmyvm.eu:5000: specifies the target

Flag 28: Celeste
The user celeste has left a list of names of possible .html pages where to find her password.
For this challenge all we’re given is a list of possible html pages that could contain the password we are looking for.
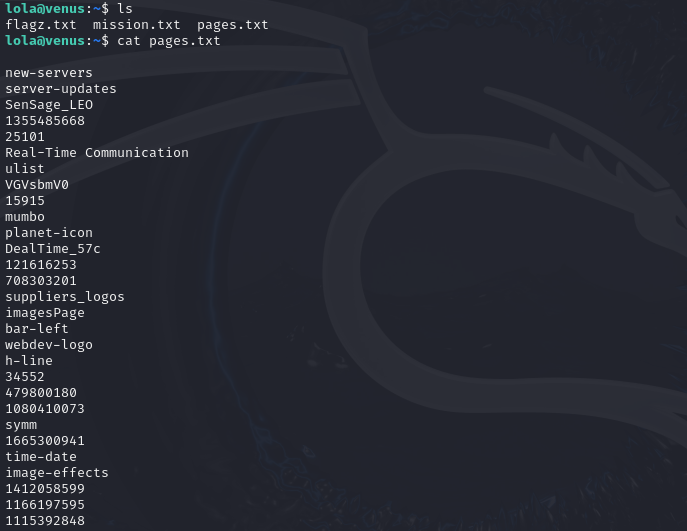
We can write a simple bash script that attempt to run “curl” on every page in this list. Most of these will fail, but one should return the password.
while IFS= read -r page; do
    curl "http://localhost/$page.html" -sf
done < ./pages.txt
Flag 29: Nina
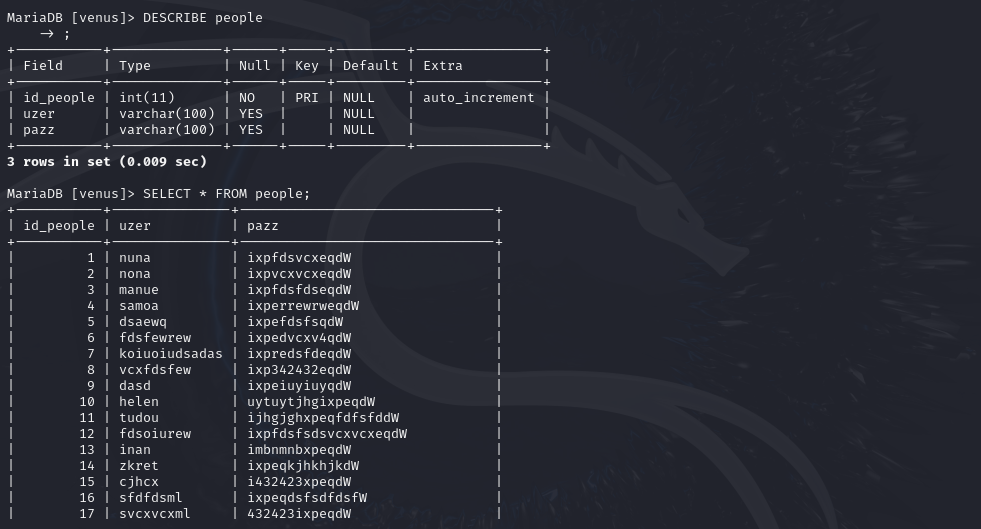
The user celeste has access to mysql but for what?
This challenge just gets you familiarized with navigation a MySQL database. The first thing we need to do is log into Celeste’s MySQL client using the command “mysql -u celeste -p”.

From here we will use some basic MySQL commands to navigate the database. The pictures below show the commands I used to eventually navigate to the database which contained Nina’s password.


Flag 30: Kira
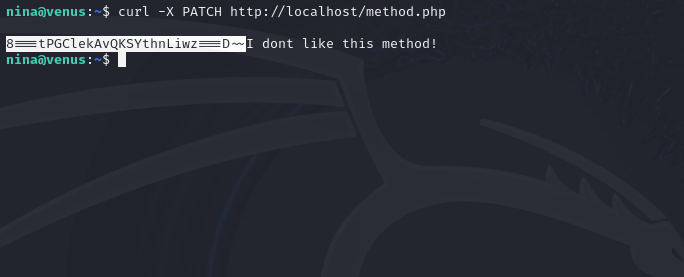
The user kira is hiding something in http://localhost/method.php
We used the “curl” command to send HTTP requests in Flag 26 and Flag 28, but this one builds upon that knowledge. Using the curl command, you can change the request method you use by appending to the command “-X <method_type”. By sending a PUT request to the localhost server, it will return the password.

Flag 31: Veronica
The user veronica visits a lot http://localhost/waiting.php
This challenge requires us to continue building upon our knowledge of the “curl” command. The localhost server is waiting for a specific HTTP header, which we can craft by appending “-H <custom-header>” to the curl command.

Flag 32: Lana
The user veronica uses a lot the password from lana, so she created an alias.
We can find the password for Lana by looking in the “.bashrc” file, which holds configurations about environment variables, aliases, and more.

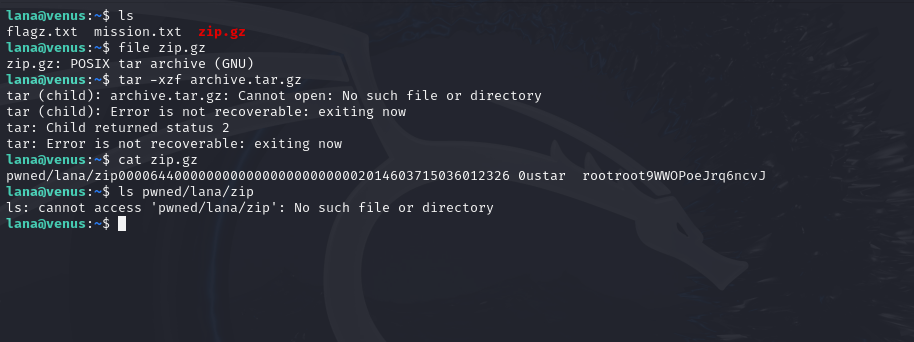
Flag 33: Noa
The user noa loves to compress her things.
With this one, the password was stored in a file called “zip.gz”. Trying to unzip it was causing some issues, however I was still able to view the password in the zip file just by using “cat” to print the contents of the file directly.
Flag 34: Maia
The password of maia is surrounded by trash
The password is located somewhere in the file called “trash”. But printing the contents of this file reveals that it won’t be so simple to find it at a glance.
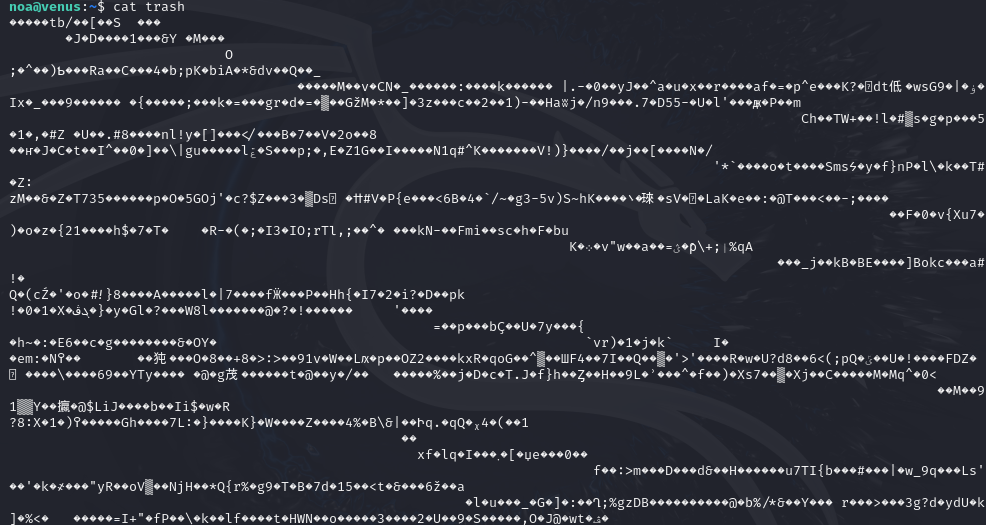
Luckily, we can use the “strings” command to only print the humanly read text content of a file. This makes the password much easier to locate.

Flag 35: Gloria
The user gloria has forgotten the last 2 characters of her password … They only remember that they were 2 lowercase letters.
If we print the contents of the “forget” file we can see what the first 13 characters of Gloria’s password are, but not the final two characters.

Despite the password being incomplete, this is all we need to get in. We can use the following crunch command to generate a list of every possible combination of 15 character passwords that begin with “v7xUVE2e5bjUc”:
crunch 15 15 -t v7xUVE2e5bjUc@@ -o passwords.txt
What this does:
- 15 15: specifies the minimum length (15 characters) and maximum length (15 characters) of each generated password
- -t
v7xUVE2e5bjUc@@: specifies the pattern the generated passwords will follow (in this case, the @ is a placeholder for any lowercase letter) - -o passwords.txt: specifies the file to output the results to

From here we can use the password list we’ve generated to crack Gloria’s password using Hydra.

Flag 36: Alora
User alora likes drawings, that’s why she saved her password as …
This password is stored as an QR code in ASCII.
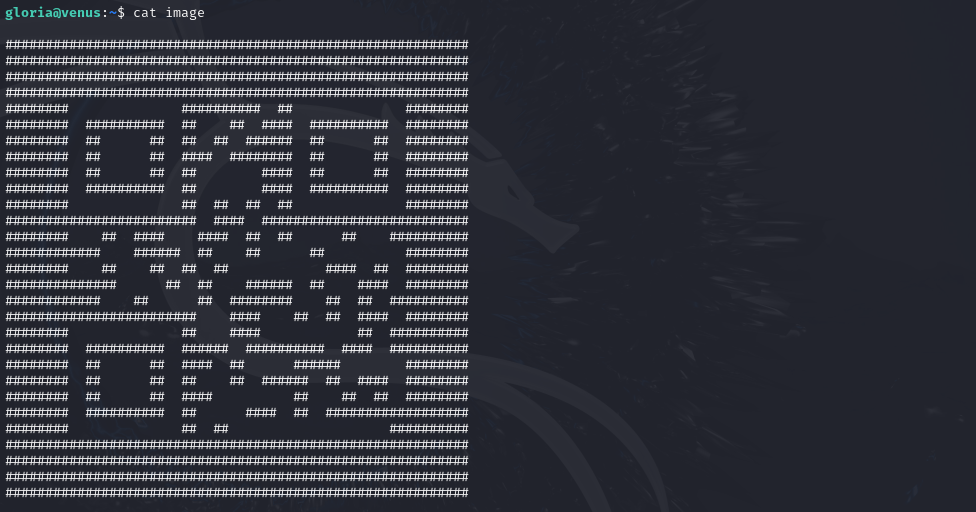
Initially, reading the QR code in this format was difficult, but I was able to make it more readable by just taking a screenshot of it and shrinking it down.

Flag 37: Julie
The user julie has created an iso with her password.
I wasn’t entirely sure whether this challenge was expecting some other type of approach, but I just found the password by printing the contents of the “music.iso” file, and the password was in there.

Flag 38: Irene
The user irene believes that the beauty is in the difference.
We are presented with two text files.
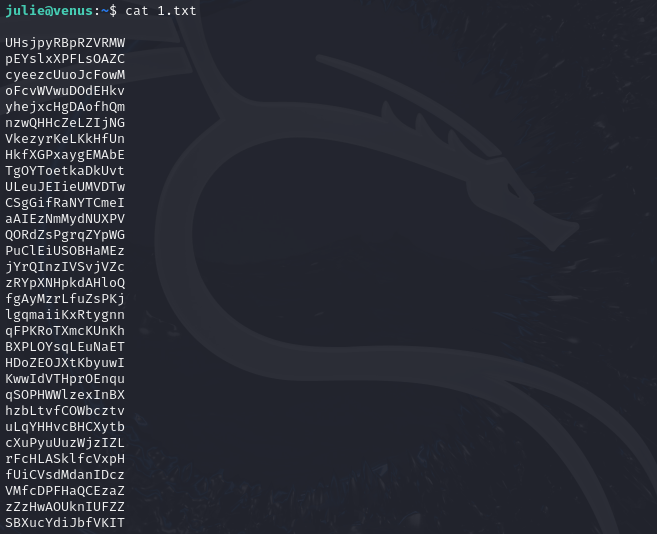

To get the password we need to combine both of these files and use the “uniq” command only print out the unique lines. Keep in mind, we need to sort these first, as the “uniq” command will ONLY work on sorted content. This is the command we will use:
cat 1.txt 2.txt | sort | uniq -u

Flag 39: Adela
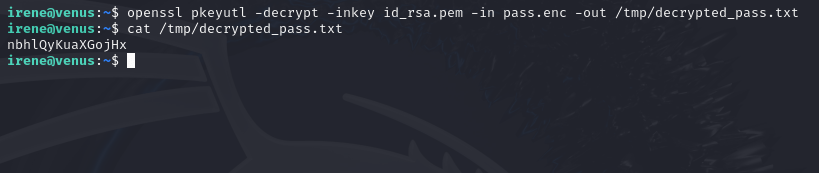
The user adela has lent her password to irene.
The solution to this one just requires using OpenSSL to decrypt the password file.
Flag 40: Sky
User sky has saved her password to something that can be listened to.
This password has been saved in morse code.
We can use any online morse code translator to decode this into the password.

Flag 41: Sarah
User sarah uses header in http://localhost/key.php
First we need to curl the address to see what we get.

This tells us that we need to use curl to send an HTTP request with a header that has the value “Key” set to “true”.

Flag 42: Mercy
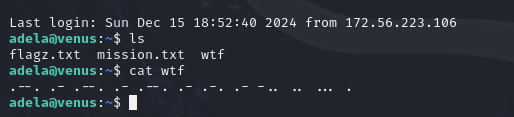
The password of mercy is hidden in this directory.
Using “ls -a” to look at all directory contents, we see an interesting file named “…”. This contains the password.

Flag 43: Paula
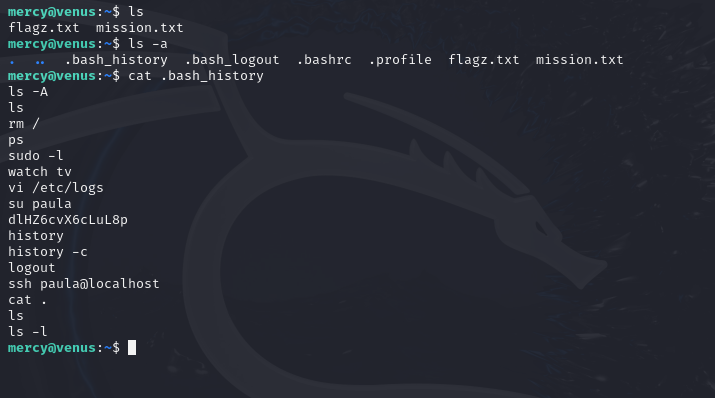
User mercy is always wrong with the password of paula.
The .bash_history file is a file on Linux systems that shows recent commands typed by a user. We can find the password for Paula’s account here.
Flag 44: Karla
The user karla trusts me, she is part of my group of friends.
We can view the groups that the current user is a part of using the “groups” command. From here, we can use the find command to find directories and files belonging to that group. This will get us closer to Karla’s password.

Flag 45: Denise
User denise has saved her password in the image.
In this case, the password has literally been written into the binary of the image file, “yuju.jpg”. We can easily extract it using the “strings” command.

Flag 46: Zora
The user zora is screaming doas!
This challenge is a good introduction to the “doas” command. The “doas” command is used to run a certain command as a specific user. This is how the command will be applied here:
doas -u zora /bin/bash
What this does:
- -u zora: specifies the user you want to run the command as
- /bin/bash: runs an interactive terminal, giving us access to Zora’s machine

Flag 47: Belen
The user belen has left her password in venus.hmv
Accessing Belen’s password simply requires curling venus.hmv.

Flag 48: Leona
It seems that belen has stolen the password of the user leona…
Reading the “stolen.txt” file will reveal that Leona’s plaintext password has not actually been stolen, but the hash has.

We can use Hashcat to try and crack the hash and get Leona’s plaintext password.

Flag 49: Ava
User ava plays a lot with the DNS of venus.hmv lately…
On Linux systems, the DNS information is stored in the “/etc/bind” directory. So this is a good place to look first.
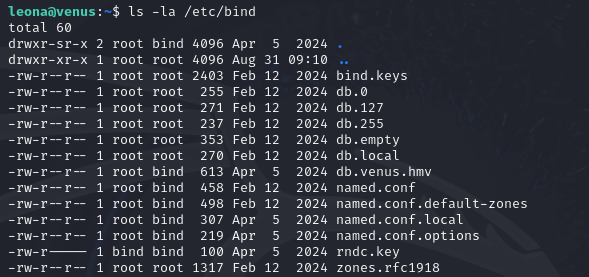
One of the DNS zone files here is “db.venus.hmv”. Using “cat” to examine the contents of it will lead us to the password.

Flag 50: Maria
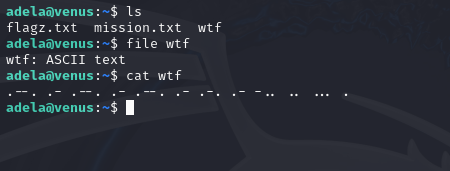
The password of maria is somewhere…
The prompt for the final challenge was so vague that I had no idea what to do. First, I decided to try and take all the other 49 passwords we acquired, place them in a text file, and use Hydra to see if any of these passwords would get us into Maria’s account. Unfortunately, this didn’t work.

After a while of trying things out, I ran out of ideas and decided to look up some help. The solution to this one is something I’m not sure I would have figured out on my own. Or if I did it would have taken a while. The solution is to log back into Adela’s account and print the morse code content of the “wtf” file again. But this time, you don’t translate the morse code. You just take the morse code string exactly as it is and that is the password.
Hidden Flags
While going through these levels, I did end up stumbling upon some hidden flags by accident. These were all the hidden flags I managed to find.
Lucia Hidden Flag
While logged into Lucia’s account, if you print the contents of the “dict.txt” file, you will find a hidden flag if you scroll far enough.

Celeste Hidden Flag
While logged into Celeste’s account, you can find a hidden flag in her MySQL database.


Nina Hidden Flag
As we remember from solving Flag 30, we know that for this flag we needed to use the “curl” command to send a request using the “PUT” method to access the password we needed. Well, if you send a curl request using the “PATCH” method you will also receive a hidden flag.

Leave a comment